
Hello Readers:
I have started this blog to show you Embedded C programming for 8051 family microcontroller using KEIL compiler. The KISS philosophy is used to write this tutorial. What is KISS? Keep It Simple, Stupid!
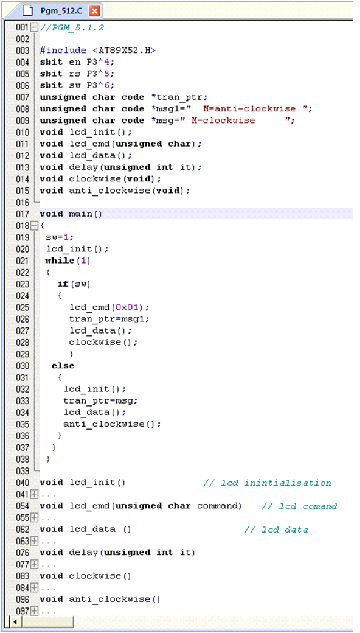
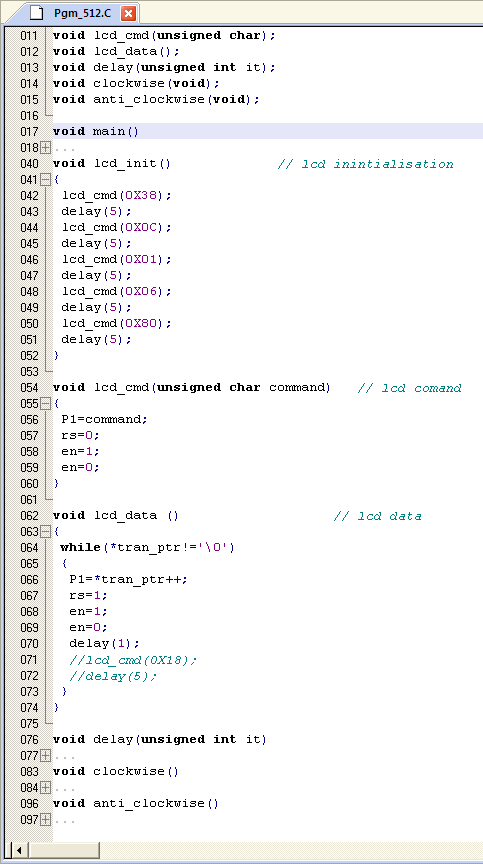
5.1 Stepper Motor
First we see how to write program for stepper motors.The stepper motor interface with microcontroller chip is a demanding application. Because all embedded systems usually needs motors, viz., for controlling door, moving vehicles, controlling robotic arms etc. This program rotates the stepper motor in both direction i.e., when switch is pressed in clockwise and when switch is released in anti-clockwise directions.

After typing the code, press F7 or click Project->Build Target for building the source code. If there are no typical errors file will build successively and shows zero errors and zero warnings.
Now enter into debug mode by pressing Ctrl+F5 or click Debug->Start/Stop Debug Session menu. Our program is sending coil winding energizes signals to Port 2 continuously. So we want to watch the Port 2 pins while running this program for changing values. To get Port 2 tab click Peripherals->I/O Ports->Port 2 text.
Run the program by pressing F5 or clicking Debug->Run. You can see the changing values on Port 2 tab continuously in binary form. Alas you can see only one direction bits change as key press procedure is not simulated here. If you generate HEX file of this program, burn it into your target chip’s memory using suitable uploader and connecting stepper motor to Port 2 you can watch stepper motor rotating in both direction after key press & release. To stop running the program press red ‘x’ mark icon or click Debug->Stop.
...till next post bye-bye & take care.
No comments:
Post a Comment